
Introduction
Cleaning up dust after renovation is essential for a safe and healthy home environment. Right after your renovation project, attentiveness to dust removal can prevent respiratory problems, allergies, and even damage to your appliances.
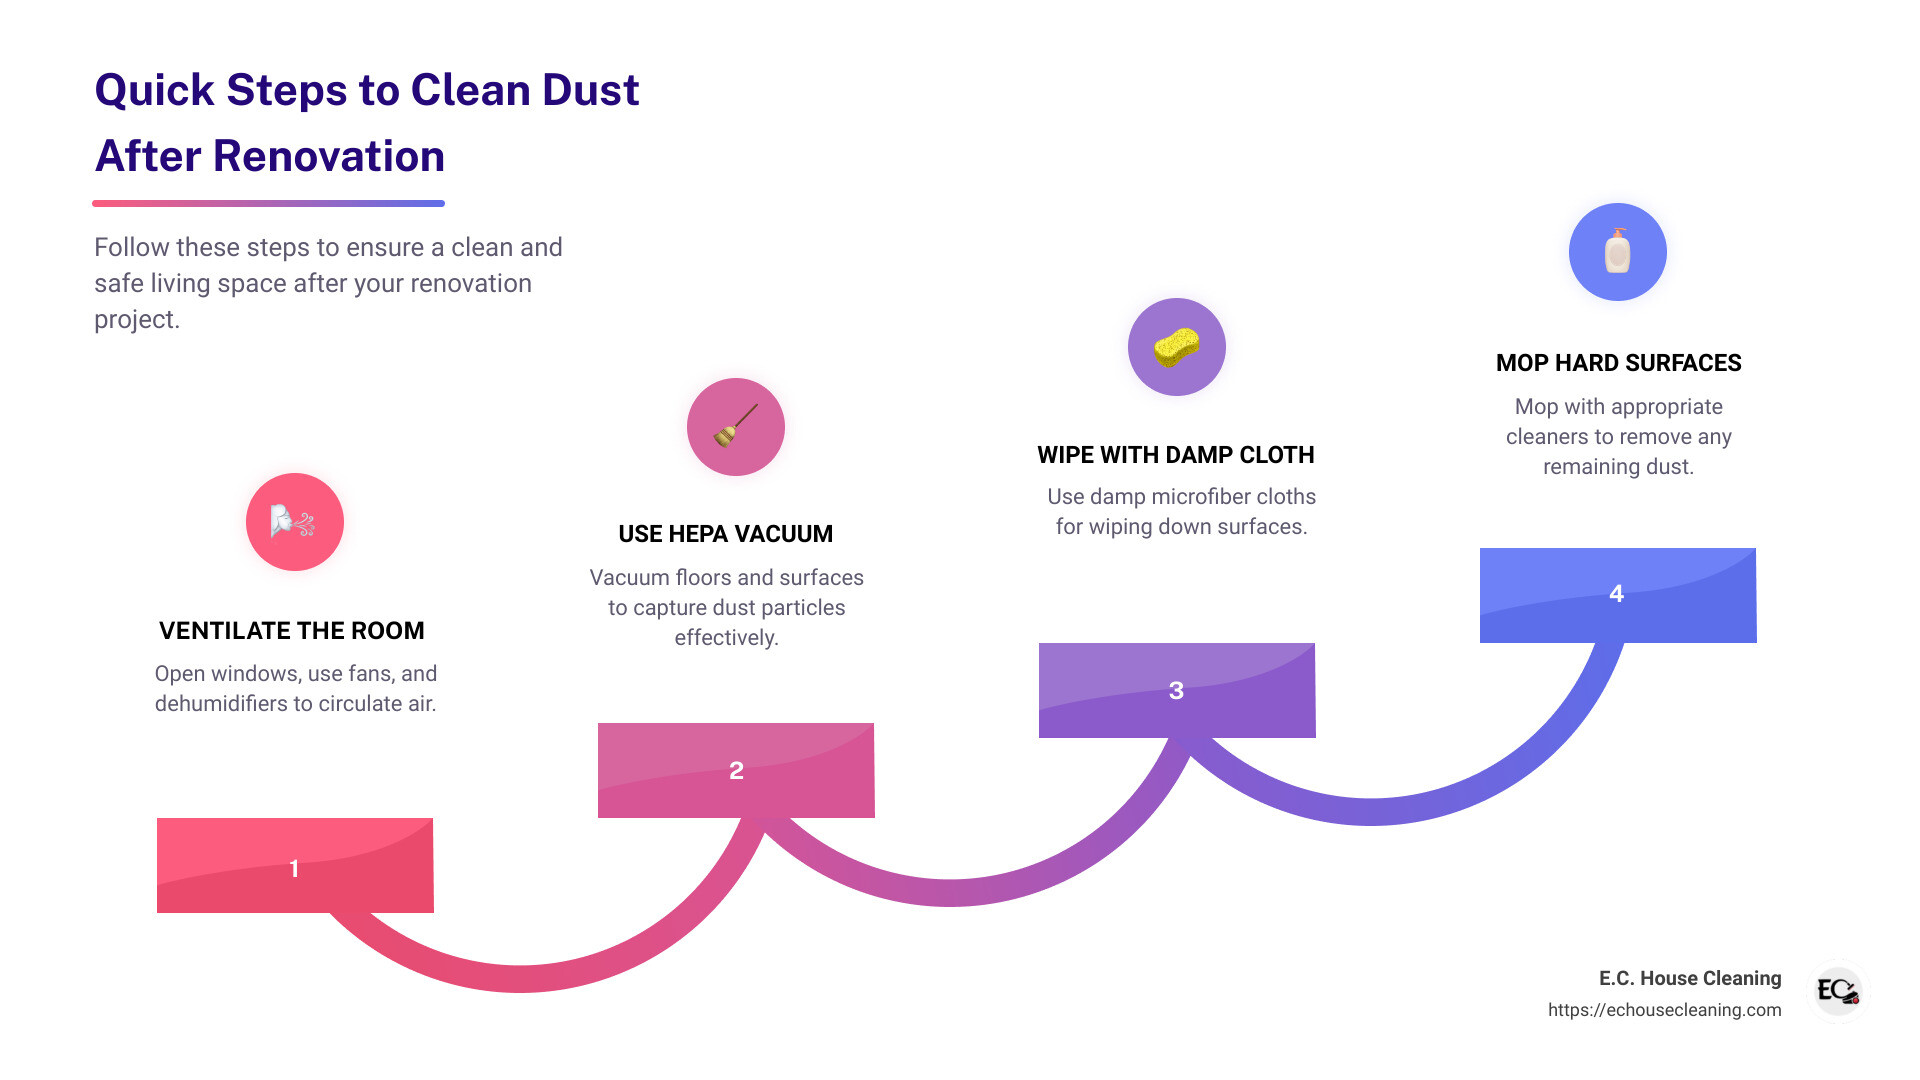
Quick steps: How to Clean Dust after Renovation:
- Ventilate the room.
- Use a HEPA vacuum for floors and surfaces.
- Wipe with damp microfiber cloths.
- Mop hard surfaces with appropriate cleaners.
- Replace air filters and clean vents.
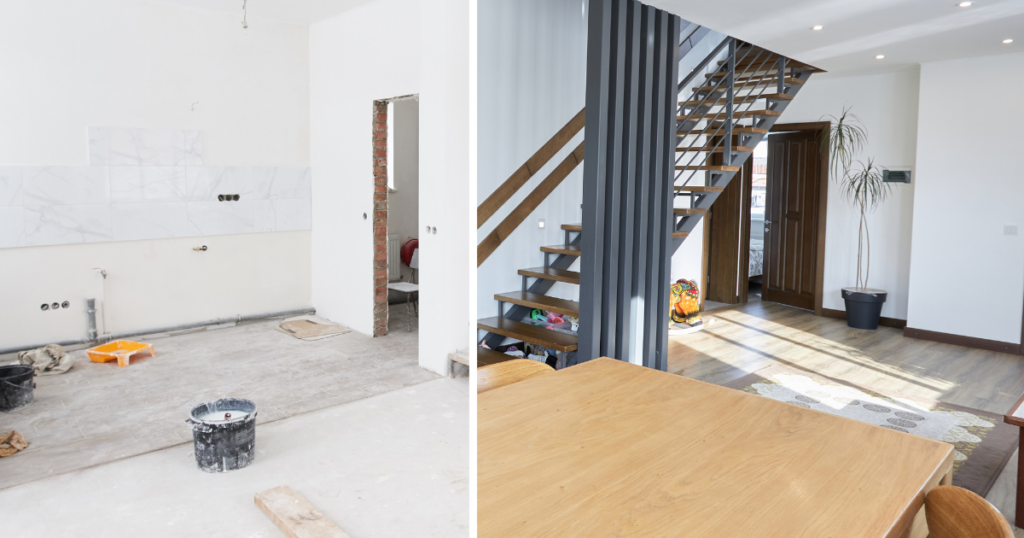
Renovation projects can be rewarding, but the aftermath often leaves your home covered in construction dust that poses significant health risks. The construction process generates a lot of debris and drywall dust, which can cause respiratory issues and trigger allergies.
Therefore, thorough cleaning is not just about aesthetics but about ensuring a safe living space.
I’m Eliana Coca, and with over 20 years of experience in the cleaning industry, I’ve seen the health risks and nuisances brought about by renovation dust. Let me guide you through effective methods to eliminate this dust and restore your home’s cleanliness.
Next, we’ll delve into the health risks posed by renovation dust and why it’s crucial to address them promptly.
Table of Contents
Why Cleaning Renovation Dust is Crucial
Health Risks of Renovation Dust
Renovation dust isn’t just an eyesore; it’s a serious health hazard. This dust can contain tiny particles from materials like wood, tile, and drywall. Prolonged exposure can lead to respiratory issues and trigger allergies. According to research, inhaling these particles can cause coughing, wheezing, and even chronic lung conditions.
Respiratory Issues from Fine Dust Particles
Construction dust can irritate your respiratory system. If you’ve been sanding or sawing during your renovation, fine dust particles can linger in the air. These particles can cause serious respiratory problems, especially for people with pre-existing conditions. Wearing a professional-grade N95 mask during cleanup is essential to protect your lungs.
Allergens
Construction dust often contains allergens that can trigger reactions. Dust mites, pollen, and other allergens can settle into your home during renovation. This can exacerbate conditions like asthma and allergies. Using a HEPA vacuum and air purifiers can help reduce these allergens and improve air quality.
Air Quality
Maintaining good air quality during and after renovation is crucial. Dust particles can circulate through your home’s ventilation system, spreading contaminants. Cleaning air vents and replacing filters are essential to reduce the amount of dusty air that can spread through the home, which can lead to allergies and respiratory issues. Changing air filters and cleaning vents can help mitigate this. Air purifiers, like the Dyson Purifier Hot+Cool Formaldehyde, can capture fine dust and VOCs, ensuring cleaner air.
Next, we’ll delve into the essential tools and equipment you’ll need for effective post-renovation cleaning.
Essential Tools and Equipment for Cleaning Renovation Dust
Cleaning up after a renovation can be a daunting task. But with the right tools, you can make your home dust-free and safe. Here are the essential tools and equipment you’ll need:
It is crucial to wear personal protective equipment (PPE) during post-construction cleaning to protect against potential hazards such as dust and sharp materials. PPE helps guard against particle pollution and ensures you are well-equipped for post-renovation cleaning.
To ensure no detail is overlooked, consider using a post construction cleaning checklist. This checklist should include tasks such as cleaning soft surfaces, wiping down hard surfaces, and cleaning air vents and filters. For those who prefer a thorough job without the hassle, professional post-construction cleaning services are also a viable option.
HEPA Vacuum
A HEPA vacuum is your best friend when dealing with fine dust. HEPA stands for High-Efficiency Particulate Air, and these vacuums are designed to capture tiny particles, including dust, mold spores, and allergens.
Why HEPA? Regular vacuums may not trap the smallest particles, allowing them to re-enter the air. A HEPA vacuum ensures that even the tiniest dust particles are trapped, improving your home’s air quality.
Microfiber Cloths
Microfiber cloths are essential for dusting and wiping surfaces. They are highly effective at capturing dust due to their electrostatic properties. Unlike regular cloths, microfiber cloths can trap dust particles rather than just pushing them around.
Pro Tip: Use a damp microfiber cloth for better dust capture. It can help in picking up more dust and preventing it from becoming airborne again.
Wet-Dry Vacuum
A wet-dry vacuum is versatile and powerful, perfect for picking up both dry dust and wet spills. This tool is especially useful for removing dust from floors and other large surfaces.
Usage Tip: Make sure to check for nails, splinters, or bits of drywall that might have been left behind by the construction crew. A wet-dry vacuum can handle these without getting damaged.
Air Purifiers
Air purifiers help in maintaining good air quality by removing airborne dust particles. Look for models with HEPA filters for the best results. Air purifiers like the Dyson Purifier Hot+Cool Formaldehyde can capture fine dust and VOCs, ensuring cleaner air.
Why Dyson? The Dyson Purifier uses advanced filtration technologies, including a laser that detects fine dust particles, making it easier to clean and maintain air quality.
Dyson Products
Speaking of Dyson, their range of cleaning products, including the Dyson V15 Detect, are excellent for post-renovation cleaning. The Dyson V15 Detect has a laser that highlights dust particles, making it easier to see and clean even the tiniest specks.
Case Study: Many homeowners have found that using the Dyson V15 Detect significantly reduces the time spent cleaning fine dust after renovations. Its advanced features make it a valuable tool in your cleaning arsenal.
With these essential tools and equipment, you’ll be well-equipped to tackle the dust and debris left behind after your renovation project. Next, we’ll guide you through a step-by-step process on how to clean dust after renovationeffectively.
Step-by-Step Guide on Post-Construction Cleaning
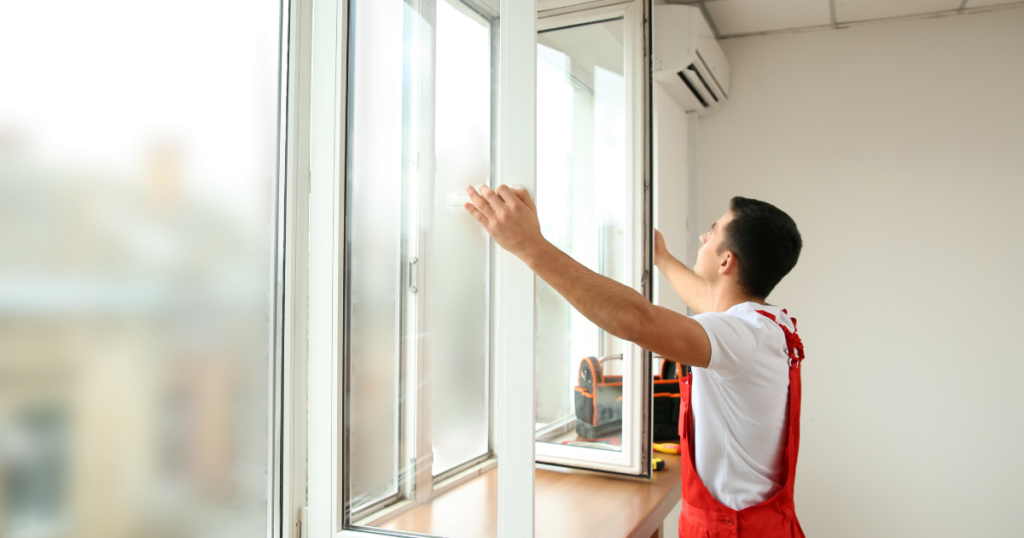
Step 1: Ventilate the Room
Start by opening all the windows. Fresh air helps to reduce airborne contaminants and clears out lingering construction dust. Use fans to increase airflow. If you have a dehumidifier, turn it on to help remove moisture and dust particles from the air.
Step 2: Rough Cleaning
This step involves removing large debris and dust. Use brooms and dry mops to sweep up big particles from floors and surfaces.
- Sweep and vacuum carpets and floors.
- Dust off surfaces like window and door frames, and light fixtures.
- Remove stickers from glass surfaces.
- Vacuum upholstered furniture like chairs and sofas.
Step 3: Deep Cleaning
Now, it’s time to get into the details.
- Wipe down all flat surfaces with a damp cloth or mop to collect fine dust particles.
- Wash away dirt buildup on windows, doors, and other overlooked areas.
- Disinfect hard surfaces using approved disinfectant products.
- Thoroughly clean bathrooms and kitchen appliances.
Step 4: Touch-Up Clean
For the final touches:
- Use an old toothbrush to remove dust from small crevices.
- Vacuum window seals and wipe them down with a damp rag.
- Change the filter on your vacuum frequently to avoid dust buildup.
Step 5: Mop the Ceiling
Dust and dirt can settle on the ceiling too. Use a long-handled mop and a cleaning solution. Mop in two directions, side to side, to ensure all dust particles are removed.
Step 6: Mop the Walls
Finally, clean the walls:
- Start with a sponge or soft-bristled brush to remove dirt from crevices.
- Use a damp cloth and soapy water to wipe down the surface. Rinse your cloth regularly and ensure all soap is removed.
Don’t forget to clean around light switches and other details that might trap dust.
With these steps, you’ll be well on your way to a dust-free home after renovation. Next, we’ll dive into how to clean specific areas like the kitchen, bathroom, and bedrooms.
How to Clean Specific Areas
Kitchen
The kitchen often collects a significant amount of dust during renovations. Here’s how to tackle it:
- Appliances: Start by cleaning your appliances. Wipe down the exterior with a damp cloth and mild detergent. For the interior, remove any removable parts and wash them separately. Don’t forget to clean the coils of the fridge and the filters in your range hood.
- Cabinets: Empty all cabinets and wipe them inside and out with a damp cloth. Use a vacuum with a brush attachment to remove any remaining dust.
- Filters: Change or clean filters in your HVAC system, range hood, and other appliances. This ensures better air quality and reduces dust circulation.
- Vacuuming: Use a vacuum with a HEPA filter to remove dust from the floor and other surfaces. This type of vacuum is effective at trapping fine dust particles.
Bathroom
The bathroom can be a haven for dust and grime post-renovation. Here’s how to clean it:
- Surfaces: Wipe down all surfaces, including countertops, sinks, and vanities, with a damp cloth and mild cleaner. Pay special attention to areas around faucets where dust can accumulate.
- Tile Floors: Sweep or vacuum the floor first to remove loose dust. Then mop with a mixture of warm water and a gentle floor cleaner.
- Faucets: Use a damp cloth to clean faucets and other fixtures. For stubborn spots, a mixture of baking soda and water can be effective.
- Grout Lines: Grout lines can trap dust and dirt. Use a brush and a mild cleaner to scrub them. For tougher stains, a mixture of baking soda and vinegar works wonders.
Bedrooms
Bedrooms also need a thorough cleaning to remove renovation dust. Focus on these areas:
- Light Fixtures: Dust light fixtures with a microfiber cloth. If they are particularly dirty, you may need to remove them and wash them with soapy water.
- Air Ducts: Clean air ducts and vents to prevent dust from circulating. Remove vent covers and wash them with soap and water. Use a vacuum to clean inside the ducts.
- Baseboards: Dust and wipe down baseboards with a damp cloth. This is a spot that often collects a lot of dust.
- Closets: Empty closets and vacuum the shelves and floor. Use a damp cloth to wipe down surfaces inside the closet.
By focusing on these specific areas, you’ll effectively remove renovation dust and keep your home clean and healthy. Next, we’ll discuss how to clean construction dust from different surfaces like hardwood floors and drywall.
How to Clean Construction Dust from Different Surfaces

Hardwood Floors
Cleaning construction dust from hardwood floors can be tricky but is essential for maintaining their beauty and longevity. Here’s a simple guide:
- Vacuum First: Start by vacuuming the floor using a soft brush attachment. This helps to remove loose dust particles without scratching the wood.
- Mop with Wood Cleaner: Use warm water mixed with a natural wood cleaner. Mop the floor in small sections, using horizontal strokes. Make sure to overlap your lines to ensure thorough cleaning.
- Tackle Stubborn Spots: For any tough spots or sticky residues, use a wood scraper gently. Be careful not to damage the floor.
- Rinse and Dry: Rinse the floor with clean water to remove any remaining cleaner. Dry the floor completely with a clean cloth to prevent warping.
Drywall and Plaster
Drywall and plaster are notorious for holding onto fine dust. Here’s how to clean them effectively:
- HEPA Vacuum: Use a vacuum cleaner with a HEPA filter to capture fine dust particles. This is crucial as regular vacuums may not trap all the dust, and can even recirculate it back into the air.
- Mild Detergent Solution: For stubborn dust patches, mix a mild detergent with water. Dampen a microfiber cloth with this solution and wipe down the surfaces.
- Damp Mopping: Use a damp mop to clean larger sections of drywall or plaster. This helps to remove dust without spreading it around.
- Dry Thoroughly: Once cleaned, make sure to dry the surfaces completely. This prevents any moisture from seeping into the drywall or plaster, which could cause damage.
By following these steps, you can effectively remove construction dust from both hardwood floors and drywall, ensuring your home stays clean and healthy. Next, let’s discuss how to maintain good air quality during and after renovation.
Maintaining Good Air Quality During and After Renovation
Keeping your air clean during and after a renovation is vital for your health. Dust and pollutants can linger in the air, causing respiratory issues and other health problems. Here’s how to maintain good air quality:
Use Air Purifiers
Air purifiers are your best friend during a renovation. They help remove dust, allergens, and other pollutants from the air. For example, the Dyson Purifier Hot+Cool Formaldehyde can capture 99.97% of particles as small as 0.3 microns. This includes dust from sanding, cutting, and other construction activities.
The Power of Dyson Purifier Hot+Cool Formaldehyde
This Dyson model doesn’t just capture particles; it also detects and destroys formaldehyde, a harmful VOC (volatile organic compound) released from new paints, flooring, and furniture. Not all air purifiers can do this, making it a standout choice for maintaining air quality.
Understanding VOCs and Formaldehyde
VOCs are chemicals that easily become vapors or gases. They are released from various building materials and can cause health issues like headaches, dizziness, and respiratory problems. Formaldehyde is a common VOC that is particularly dangerous. It can cause cancer and other severe health issues.
Tips for Using Air Purifiers
- Run them continuously: Keep air purifiers running throughout the renovation and for at least two weeks after. Dust can resettle during this time.
- Use multiple units: If possible, have one air purifier on each floor to ensure comprehensive coverage.
- Change filters regularly: Follow the manufacturer’s instructions for filter replacement to maintain efficiency.
Additional Tips
- Ventilate the Room: Open windows and use fans to help clear out dust and fumes. However, keep windows closed if outdoor pollution is high.
- Seal Off Renovation Areas: Use plastic barriers to prevent dust from spreading to other parts of your home.
- Change HVAC Filters: Your HVAC system circulates air throughout your home. Change the filters regularly to prevent dust buildup.
Maintaining good air quality is crucial for your health and comfort. By using high-quality air purifiers like the Dyson Purifier Hot+Cool Formaldehyde, you can effectively manage dust and harmful VOCs during and after your renovation.
Next, let’s dive into some frequently asked questions about cleaning renovation dust.
Conclusion
Cleaning up after a renovation is not just about aesthetics. It’s crucial for your health and well-being. Renovation dustcan contain harmful particles like silica, mold, and even volatile organic compounds (VOCs). These can trigger allergies and respiratory issues. A thorough cleaning ensures a safer and healthier living environment.
For those who find post-renovation cleaning overwhelming, we can help! E.C. House Cleaning offers professional cleaning services tailored to your needs. Our team uses advanced tools and eco-friendly products to ensure every nook and cranny is spotless.
Don’t let renovation dust linger and affect your home’s air quality. Trust us to get your space clean and fresh, so you can enjoy your newly renovated home without the hassle.
For a cleaner, healthier home, contact E.C. House Cleaning today!
By following these guidelines and considering professional help, you can ensure your home remains a clean, healthy, and comfortable space. Happy cleaning!
Frequently Asked Questions about Cleaning Renovation Dust
How do you clean dust off walls after renovation?
Cleaning dust off walls after a renovation can be challenging but is essential for maintaining indoor air quality. Here’s a simple method:
- Vacuum: Start with a vacuum cleaner equipped with a HEPA filter. This helps to capture fine dust particles. Use the brush attachment to gently vacuum the walls.
- Microfiber Cloths: Wipe down the walls with a damp microfiber cloth. Microfiber is excellent at trapping dust and won’t scratch surfaces.
- Sponges: For more stubborn dust, use a sponge with a mild detergent. Gently scrub the walls and then rinse with a clean, damp sponge.
How do you get rid of remodeling dust?
Getting rid of remodeling dust requires a systematic approach:
- Vacuuming: Use a powerful vacuum, preferably a shop vac, to clean large debris and dust. Make sure to change the filter frequently to maintain suction power.
- Microfiber Cloths: Use microfiber cloths to dust surfaces, as they are more effective than regular cloths at trapping dust.
- Powerful Suction: A vacuum with powerful suction can make multiple passes to ensure all dust is captured. Don’t forget to vacuum upholstery, curtains, and carpets.
- Air Purifiers: Consider using air purifiers with HEPA filters to capture airborne dust particles and improve air quality.
How long does it take for dust to settle after renovation?
The time it takes for dust to settle after a renovation can vary based on several factors:
- Particle Size: Larger particles settle faster, while smaller particles can remain airborne for longer periods.
- Humidity: Higher humidity levels can cause dust particles to settle more quickly.
- Air Circulation: Good air circulation can help disperse dust particles, making them settle faster. Use fans and open windows to improve air flow.
Typically, you can expect dust to continue settling for up to two weeks after the renovation. Regular cleaning during this period is essential to keep your home dust-free.
Next, we’ll explore the best practices for maintaining a clean home environment.
Our Content
All content is written by E.C. House Cleaning’s professional cleaning company for Boston Maid Service. We put our expertise in house cleaning services into each piece of content, focusing on providing valuable, accurate, and relevant information. With over 20 years of deep, full cleaning service industry experience in the Massachusetts and Boston area with a proven track record of pet-friendly cleaning services in Massachusetts, cleaning for a construction project, and trust for customers as signaled by our hundreds of 5-star reviews, E.C. House Cleaning is an authority on residential and commercial cleaning services.